Saturday 31 March 2012

Slack leather.

As things settle and move during shake down drives (first 500-1000 miles in my eyes), a couple of things have niggled me. One was the passenger side of the dash. After a crisp winter I noticed some ripples had appeared.
 I tried to moisten it and shrink it with a heat gun but that didn't work. So, as I have had to pull it out to get the ECU bits done, I decided to tackle this. I had to pry the leather off the glued bit with a sharp blade.

Pull the ripples out by adding a bit more tension and re glue. Bit of a pain, but no more ripple niggles (try saying that fast :-P )


The gear shift gaiter was the next niggle, I had used the screws to hold the leather in place, but one side came loose and I could see a bit of gearbox.


So I glued the leather to the stainless.

Saturday 24 March 2012

Oil catch tank & Filter spacer.

As it was out of action and I awaited some bits to arrive, I decided to take a look at my catch tank. Oil was being blown onto the rocker cover and alternator. I soon realised there was nothing inside to collect any vapour, no baffles, nothing! So most of it was going in and straight out.


 Using some scraps I had laying about getting hooked and caught on things, I Heath Robinson'ed it! Bit of hose to direct the vapours away from the outlet. I could have used stainless scouring pads instead. I'll see how this works for now.


 Time will tell.

Next was the Oil cooler spacer plate. The oil cooler supplier sent me the wrong one origionaly but I made do as it worked. But it mounted the oil filter about 5mm from the exhaust. Pull exhaust off to remove filter!!! Not great but I wrapped it in insulation to get me past the IVA. Anyway, some months later and plenty of emails chasing it with break down in communication between themselves, GD eventually gave them a kick and I got the correct one through.


ECU Upgrade

Lots have been going on, so time for an update!!! (FEB-JULY)

I finally decided I had had enough brain melting trying to get the car tuned with the out of date hand module that came with ProFlo that no one knew how to use correctly.

Speaking with a few people I decided to go for MegaSquirt 2 Extra. Built professionally by Phil at http://www.extraefi.co.uk
You can buy these as a component form to DIY build but I have read of so many issues with fake kits or not what you expected or ordered. So got a pro to make it. He also helped me get the right bit of kit for my setup.
I also had to upgrade to a Wideband O2 sensor as ProFlo used a narrow band. Basically the old O2 only worked in a small range so couldn't tell if it was very rich or very lean, unlike wideband.

So out it comes.

 Yes, that's the unit I had to use to use to tune all the parameters it allowed! Thanks to Robert for setting it up initially on the Dyno at EDA, otherwise I wouldn't be driving it.
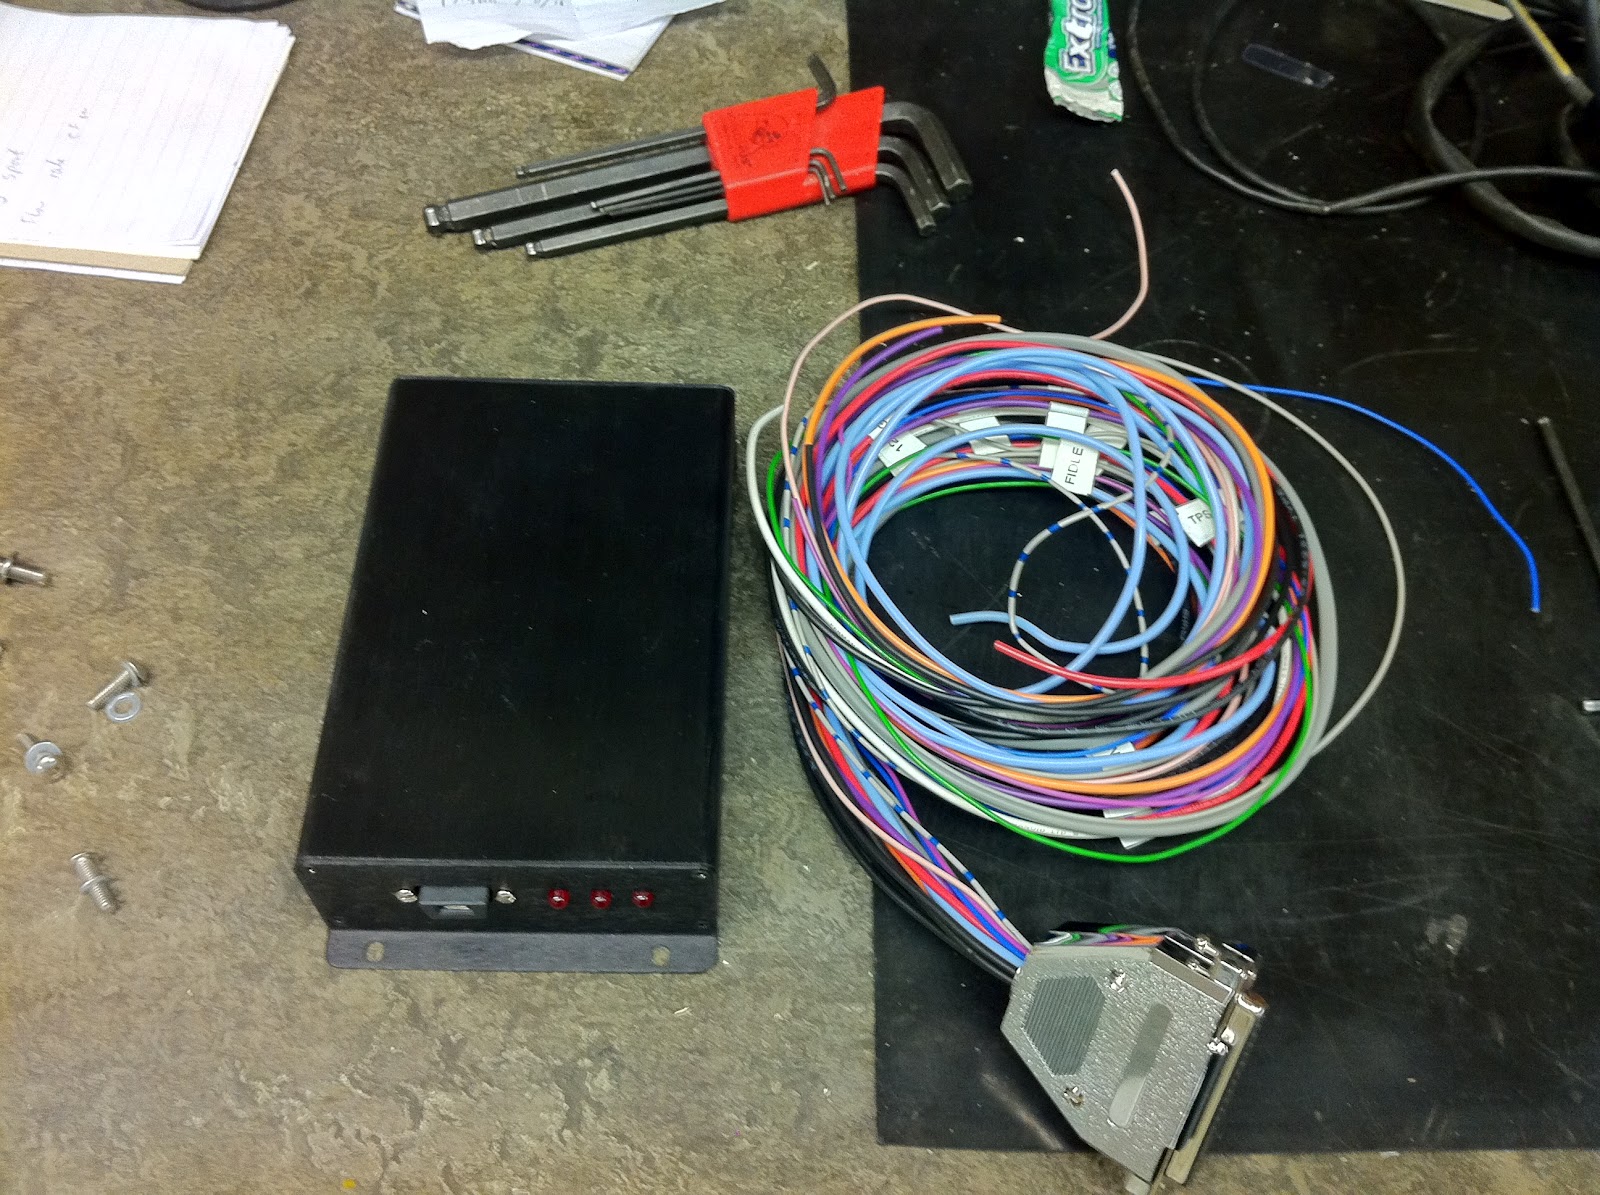

MS2 unit and loom

Plenty more reading, wiring, head scratching and Cider'ing

As I was busy working, I had little time to get stuck into it. So spent many lunch breaks working out the wiring from my old setup to the new loom via wiring diagrams. I wanted to chop the old connector off and splice into the existing loom with the new connector.
I didn't get a chance to take pics of the loom splicing as time was precious and I had to crack on.
Basically I used 2 Sub D connectors to join the 2 looms rather than joining the wires direct.
 
MS2 in its new home. As its a bit thicker, I had to mount it under the middle of the dash plates. Dual-Lock by 3M. brilliant stuff!